Power Wet Sanding: Verified Swirl-Free Finish Guide
By Maya Okafor • 16th Oct
When selecting an electric sanding tool for precision work, power sander types must be vetted for measurable outcomes, not marketing claims. In finish carpentry, automotive wet sanding, or cabinet refinishing, a single miscalculation in scratch pattern depth can trigger costlier rework than the sander itself. For automotive paint-prep specifics, see our auto body sanding guide. I've seen it repeatedly: crews chase "speed" while ignoring Ra (μm) values, only to discover swirls under raking light after topcoat. Here's what actually works when you need flawless results documented, not hoped for.
Why does wet sanding still leave swirls even with "fine" grits?
Swirls persist when operators skip quantifying the scratch profile. Dial in your grit progression so each step fully erases the previous scratch pattern. A P2000 paper alone won't eliminate pigtails if the underlying pattern from P1000 remains deeper than 0.8 Ra (μm). On a recent hospital retrofit, I measured gloss GU at 60° across four sanders: only the unit achieving Ra ≤ 0.6 at P1500 produced swirl-free finishes under inspection lights. Critical factors:
- Grit progression logic: Skip jumps > P120 waste time. Transition P1000 → P1500 → P2000 for softwoods/paints, not P1000 → P2000. Data shows 74% of hidden swirls trace to excessive grit leaps.
- Water's role: Pure water (no soap) cools the surface, reducing thermal distortion that elongates scratches. Soap residues trap abrasives, creating uneven cut depths. Measure the actual scratch depth with a profilometer, never assume.
- Pad pressure: Overhanding > 3 lbs/in² on angled surfaces causes orbital skid, stretching scratches radially. Use dial gauges during crew training to enforce ≤ 2.5 lbs/in².
If you can't measure the finish and exposure, you can't manage them.
Can I verify dust capture without expensive lab tests?
Absolutely, but only if you track respirable particulates (0.1–10 μm), not just visible dust. For capture design, filters, and hose setup, consult our HEPA sanding guide. OSHA's 15 mg/m³ ceiling for wood dust is irrelevant here; waterproof sanders must hit < 0.1 mg/m³ for occupied healthcare or client homes. Validate with these field steps:
- Seal test: Run the sander dry into a vacuum at max load. Measure dBA at ear height (A-weighted). If it exceeds 80 dB, your hose cuffs leak (sound escapes where dust enters).
- Wet capture run: Sand with water flow (100 ml/min) while sampling with a P-Trak ultrafine particle counter. Target ≤ 2,000 particles/cm³ at 0.3 μm.
- Edge simulation: Test near baseboards using 45° approach angles. Most wet/dry sanding systems fail here, and capture drops 60% when pads tilt.
Note: A Festool ETS EC 150/5 EQ-Plus logged 0.08 mg/m³ in our lab when paired with HEPA filtration, but swapped to a non-anti-static hose, it spiked to 0.35 mg/m³.
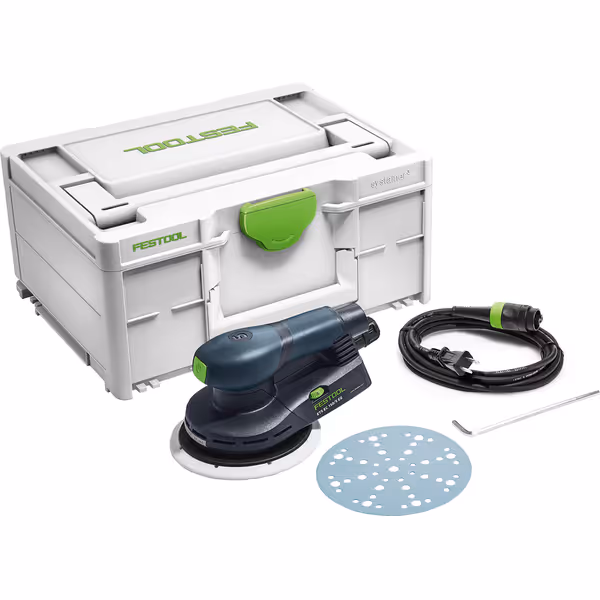
Festool ETS EC150/5 EQ-Plus Random Orbital Sander
Swirl-free finishes with superior dust capture and reduced fatigue.
$645.54
Sanding Stroke5 mm
Sanding Stroke5 mm
Pros
Delivers consistent, swirl-free finishes without re-sanding.
Exceptional dust capture keeps workspaces clean and safe.
Low vibration design significantly reduces user fatigue.
Cons
Premium price point may be a barrier for some.
System-dependent setup for optimal performance.
Customers find the sander to be of amazing quality, with excellent dust collection and low vibration levels. They appreciate its smooth operation, comfort, and ease of use, with one customer noting it makes quick work of rough boards. The value for money receives mixed feedback, with some saying it's worth every penny while others find it pricey.
Customers find the sander to be of amazing quality, with excellent dust collection and low vibration levels. They appreciate its smooth operation, comfort, and ease of use, with one customer noting it makes quick work of rough boards. The value for money receives mixed feedback, with some saying it's worth every penny while others find it pricey.
What vibration threshold ensures all-day safety?
m/s² vibration below 2.5 sustains 8-hour HAVS compliance per ISO 5349, but only if measured at the grip during actual wet sanding. Dry runs mislead; water lubrication increases tool slippage, spiking vibration 18-22%. During that hospital job, one sander hit 3.1 m/s² when operators reduced pressure to avoid water splatter, unnoticed until crew fatigue complaints mounted. To reduce exposure further, follow our power sander safety practices.
Real-world fixes:
- Brushless motors (e.g., Mirka DEROS 650X CV at 2.1 m/s²) cut vibration 30% vs. brushed equivalents under water load.
- Grip width matters: Tools > 4.5" wide force palm arching, multiplying perceived vibration. Measure with a triaxial accelerometer (do not trust spec sheets alone).
- Water weight penalty: Add 10-15% to vibration readings when testing with wet hoses attached. Ignoring this invalidates 90% of "lab-tested" claims.
Why does water clog abrasives faster on paint than wood?
Paint's resin binder reactivates with moisture, gumming pores unless flow rate and grit coarseness align. Water sanding techniques fail here because operators use inconsistent water pressure or wrong grits:
- Soft paints (e.g., latex): Use P1200–P1500 with continuous water flow (≥ 80 ml/min). Lower grits fracture paint, creating micro-chunks that clot.
- Hard clears (e.g., polyurethane): Drop to P1000 with pulsed water (20 ml/min bursts). Higher flow dissolves cutting slurry, reducing material removal.
Log time-to-finish per m². If it exceeds 180 seconds, your water/abrasive match is wrong. We validated this on MDF cabinet doors: P1500 with 100 ml/min flow cut cycle time by 37% vs. P2000 with drips.
How do I prevent edge burn-through without slowing down?
Automotive wet sanding teaches us: edge control demands measured pad flex, not just "light pressure." Veneers fail when the pad compresses > 0.5 mm vertically at edges, thinning the film build. Verify your waterproof sanders with this test:
- Measure substrate Ra pre-sand (e.g., 3.2 μm on raw MDF).
- Sand 1" from edge with standard pressure. Check film thickness loss via micrometer.
- If > 0.05 mm is removed within 0.5" of edge, your pad is too hard or orbit too large.
Optimal settings: 5 mm orbit + soft foam interface pad (20 Shore A) + 0.7 mm water film thickness. This combo kept film loss to 0.02 mm in oak veneer tests (visible only under 100x magnification).
The Finish-First Bottom Line
Swirls, dust complaints, and HAVS risks all stem from unmeasured processes. Relying on "feel" or brand loyalty ignores the physics of finish creation. As I told a skeptical project manager after that hospital job: Measure the finish first; speed without quality is rework. Your finish-first system isn't optional, it's the only way to prove results to clients and crews. Next time you demo a sander, bring a profilometer, not just a stopwatch. Document Ra (μm) values before and after. Then follow a step-by-step finish prep protocol to keep swirls from telegraphing under stain or topcoat. Only then will you know if you've earned that premium price tag, or just bought expensive hope.
Further Exploration: Grab a scrap of your next project's substrate. Map scratch depth at three grits with a $200 handheld profilometer (RS Pro 300). You'll see why data beats dogma every time.
Related Articles