
Jet Oscillating Sander and Delta Pad Setup for Flush Repairs[9][13][14]
By Saanvi Iyer • 17th Sep
![Jet Oscillating Sander and Delta Pad Setup for Flush Repairs[9][13][14]](/images/article/thumbnail/82e66934-8ae6-41b0-8c0b-8934d18e76de.avif)
What to do
For a flush repair, first distinguish a JET oscillating spindle sander from a handheld oscillating multi-tool: the evidence supports the latter with a compatible triangular hook-and-loop pad for corners, edges, small panels, and trim—not a universal JET delta-pad setup.
- Start with: Identify the exact tool and confirm its accessory interface in that model’s manual. Do not infer compatibility from the word “oscillating.”
- Then: Disconnect power, inspect and secure the workpiece, engage the pad’s matching holder interface, press on the abrasive, and select speed according to the tool, accessory, surface, and project.
- Important prerequisite: Use appropriate eye, hearing, and respiratory protection, with dust collection where provided. The evidence does not establish a universal grit, speed, or technique that guarantees a flush finish.
A jet oscillating sander and a triangular delta pad are easy to group together in conversation, but they are not necessarily the same tool system. That distinction matters before a crew selects a tool for sanding a small repair. For a broader overview of sander attachments and accessories, verify the interface and intended use before standardizing a repair setup. JET describes its oscillating spindle sanders as machines that move vertically while spinning, intended for curves and contours. The delta sanding-pad information addressed here instead concerns a handheld oscillating multi-tool fitted with a hook-and-loop detail pad. Do not assume that a JET spindle sander accepts a delta pad, or that its accessories interchange with a handheld multi-tool.
For flush sanding repairs, that is more than a naming detail. The repair may be small, but the decision affects access, surface control, dust planning, and the consistency of the final appearance. Protect hands and lungs while keeping the setup specific to the tool in front of you.
FAQ: What does "oscillating sander" mean in this setup?
It can mean two different things.
- A JET oscillating spindle sander is described by JET as moving up and down while spinning. Its stated role is sanding curves and contours evenly.
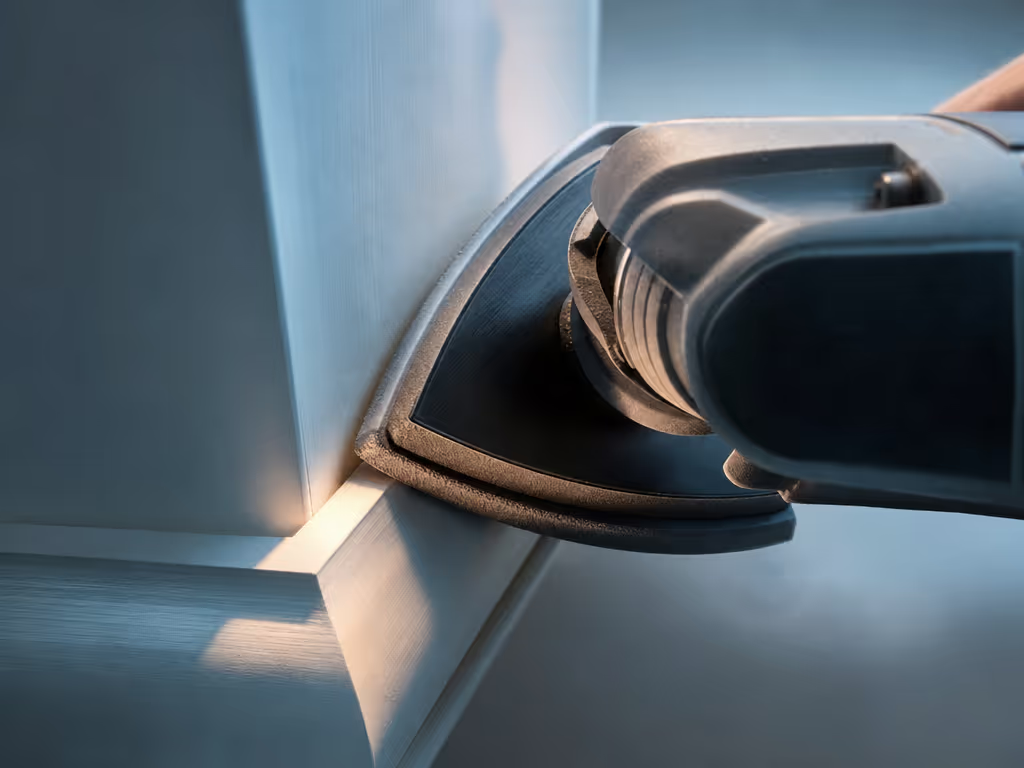
- A handheld oscillating multi-tool can be fitted with a triangular detail sanding pad and hook-and-loop abrasive. Its manufacturer-described uses include corners, edge finishing, small panels, and trim.
That distinction should determine the workflow. A spindle sander addresses shaped work that can be brought safely to its sanding spindle. A handheld delta pad addresses restricted locations such as a corner, a short run of trim, or a small patch area that cannot conveniently be taken to a stationary machine.
The available information does not establish that a JET spindle sander is compatible with a triangular hook-and-loop pad. Treat any proposed crossover as an accessory-interface question for the specific model, answered by that model's manual (not by the shared word "oscillating").
Protect hands, lungs, and tempo; the finish will follow.
FAQ: When is a delta sanding pad relevant to a flush repair?
A delta sanding pad is relevant when the repair area is constrained by geometry: inside corners, near edges, on small panels, or along trim. Manufacturer-published application information lists wood, filler, primer, and painted surfaces among the workpiece categories for a handheld detail-pad arrangement.
That makes the arrangement a plausible access tool, not a universal declaration that it will deliver a flush, finish-ready repair on every substrate. The available evidence does not provide an independently tested method for bringing filler flush to an adjacent finished surface, nor does it compare this setup with a dedicated detail sander for finish quality, vibration, speed, or productivity.
For crews standardizing flush sanding repairs, that limitation is useful. Record the setup as a controlled detail-sanding step, then inspect the repair under the project's required viewing conditions before releasing it to primer or topcoat. Do not treat the triangular shape of the pad as proof of the result.
FAQ: How should a delta sanding pad be installed?
Follow the exact accessory instructions for the multi-tool being used. On the documented corded oscillating multi-tool, the safe sequence is straightforward:
- Disconnect power before changing the accessory or abrasive. For a cordless tool, use the isolation procedure specified by its own manufacturer.
- Inspect the repair zone. The documented manual directs users to make sure there are no nails or foreign objects in the portion being sanded.
- Secure and support the workpiece. Clamps or another practical method on a stable platform are specified in the manual. Fixed installed trim creates different constraints, so focus on confirming that loose pieces, adjacent components, and the work area are stable.
- Mount the hook-and-loop sanding pad. In the documented interface, the accessory slots and holes must engage the matching teeth on that tool's accessory holder for the accessory to be secured.
- Press the abrasive firmly onto the pad. The manual specifies mounting the hook-and-loop pad first, then pressing the sandpaper onto it.
- Remove abrasive by peeling it away from the hook-and-loop face.
These details are intentionally narrow. The manual also directs the user to use only accessories designed for that tool. An open-back accessory note in one manual is not evidence that every open-back blade or sanding pad fits every oscillating tool, and it is not a reason to alter, force, or improvise an interface.
FAQ: What speed and abrasive should the crew use on mixed materials?
The defensible answer is: begin with the tool and abrasive manufacturer instructions, then document what the project specification and test area require. The collected manual for one documented oscillating multi-tool specifies an adjustable no-load range of 10,000 to 21,000 OPM. For that tool, the manual states that optimal speed varies with the accessory, the surface being worked, and project complexity.
It does not provide a material-specific delta-pad chart for wood, filler, primer, or paint. The available information also does not substantiate a universal grit progression, pressure rule, or speed setting for mixed material sanding techniques.
That absence is a reason to resist false precision. For a crew SOP, capture only observations you can repeat and inspect:
- substrate and coating condition;
- pad and abrasive identification;
- selected tool setting;
- whether abrasive loading becomes visible;
- the appearance of the repair boundary after the specified inspection step; and
- whether the pad, backing, or attachment shows damage.
This creates a job-specific record without pretending that one recipe transfers automatically from painted trim to filler, primer, wood, or an unknown coating. It also makes training more honest: the apprentice follows a defined setup and inspection loop rather than guessing from a grit number alone.
FAQ: How should dust, respiratory protection, and noise be managed?
Connect dust-extraction and collection equipment where the tool provides those facilities, and use it properly, as the documented manual directs. That is an important control, but the available information does not establish that every oscillating multi-tool or delta pad includes extraction. Check the actual tool, pad, hose connection, and collection equipment before the work begins.
Use power sander safety practices and protective gear, including eye, hearing, and respiratory protection appropriate to dusty power-tool work. For wood processing, uvex states that FFP2 respirators are well suited to softwood work except in extremely high dust-exposure environments; for hardwood cutting and sanding, it states that FFP3 should always be used. For uncertain or older paint, uvex advises caution with FFP3 because older coatings may contain hazardous materials. These are general FFP-class recommendations, not a substitute for local requirements, task-specific selection, or identification of potentially hazardous coatings.
A P2/P3 comparison may be part of a site respiratory program, but do not equate labels across jurisdictions without checking the applicable standard and the selected equipment's instructions. Likewise, do not describe a setup as "dustless". Use capture where provided, maintain suitable PPE, and inspect the work zone rather than relying on a marketing label.
For exposure management, avoid invented precision. The available information does not provide tool-specific vibration figures in m/s² A(8), exposure durations, dBA-at-ear readings, or dose percentages. Yet the practical discipline remains sound: keep hose weight balance from pulling the tool off line, avoid unnecessary sustained use, and build breaks or rotations into interior detail work. On one school renovation, an apprentice's mention of hand tingling was enough to make the team reassess its tool rotation and hose handling before the next run of repairs.
FAQ: Is an oscillating multi-tool a replacement for every sander?
No broad replacement claim is supported here. A handheld oscillating multi-tool with a detail pad is manufacturer-described for corner sanding, edge finishing, small panels, and trim, including wood, filler, primer, and painted surfaces. That supports a narrow role in detailed access work.
It does not establish that the tool is superior to, or a substitute for, every dedicated sanding machine. Nor does it establish comparable surface quality, removal rate, vibration, noise, dust capture, or overall productivity. Select it for the access problem it can address, then verify the appearance required for the repair.
Further exploration: build a repeatable repair setup
Before placing a delta pad into a flush-repair process, confirm four items: the exact tool type, the approved accessory interface, the condition of the surface being sanded, and the site's dust and PPE controls. Then preserve a short setup record for the job rather than relying on assumptions carried over from another material.
That approach keeps the distinction clear: a JET spindle sander is described for curves and contours, while a handheld multi-tool with a compatible delta pad is a focused option for small, detailed sanding locations. The most professional setup is the one whose interface, containment, and inspection steps can be repeated safely by the whole crew.
Related Articles