![Jet Oscillating Sander and Delta Pad Setup for Flush Repairs[9][13][14]](/images/article/thumbnail/82e66934-8ae6-41b0-8c0b-8934d18e76de.avif)
Lathe Sanding Guide for Swirl-Free Woodturning Techniques
By Saanvi Iyer • 14th Sep

What to do
For swirl-free woodturning, make a clean final cut, sand at reduced speed with fresh abrasive and light pressure, and inspect each grit stage before advancing. Stop the lathe for with-grain correction where circular scratches remain.
- Start with: A sharp tool and light finishing cut.
- Then: Keep a power-sanding pad moving, clear dust between grits, and inspect under raking light. On tight bowl curves, use smaller pads; a soft interface pad can help.
- Important prerequisite: Control the hazards first: confirm clearance, start slowly, stop for vibration or unsafe access, protect your face and lungs, and never put fingers inside a spinning hollow form.
Important: There is no universal sanding RPM or final grit. Match the pad to the curve, adjust for the workpiece, and follow the instructions supplied with your lathe and powered tools; airborne wood dust is a health hazard.
Swirl-free work is less about finding a magic abrasive than controlling the scratch pattern from the final tool cut onward. These woodturning sanding techniques give you a repeatable lathe sanding guide for bowls, spindles, and detailed forms: reduce speed, use the least-aggressive grit that will actually correct the surface, and verify every stage under raking light before moving on. That discipline protects hands and lungs while preventing the late-stage discovery that a "smooth" turning is full of circular scratches.
Protect hands, lungs, and tempo; the finish will follow.
Start With a Surface Worth Sanding
Sanding should refine the final cut, not become a slow rescue operation for torn grain, deep tool marks, or a shape that still needs correction. Before reaching for abrasive, sharpen the turning tool and take a light finishing cut. This keeps sanding focused on refining the surface rather than repairing poor tool work.
Use a simple decision rule:
- If a defect is local and deep, return to cutting if the form allows.
- If the surface is clean but carries light tool marks, begin sanding with the finest grit that removes them efficiently.
- If the work is already fair and clean, do not automatically start coarser "for insurance." Choose the starting grit according to the defects that remain.
The correct grit sequence is conditional: it follows the defects in front of you, not a fixed recipe copied from another species, shape, or finish schedule. Move only toward finer grits, and only after the current abrasive has fully erased the preceding grit's scratch pattern.
Set the Lathe Up for Control, Not Speed
Reduce lathe speed for sanding. This practical guidance also helps you manage heat while working the surface.
For many bowls and medium-sized turnings, approximately 250-500 RPM is a useful starting range, not a universal instruction. Another practical guideline is to keep power sanding at 500 RPM or below and hand sanding at roughly half the turning speed. Diameter, balance, wood, grit, pressure, and whether you are sanding by hand or with a powered accessory all change what is appropriate.
Use the machine response as a hard stop:
- Rotate the workpiece by hand to confirm clearance before startup.
- Start at the lathe's slowest setting, particularly with a large or out-of-balance blank.
- If the work vibrates, reduce speed and stop to find the cause.
- Do not treat an RPM number as permission to continue through vibration or instability.
Keep a power sander moving across the surface rather than dwelling in one place. A long pause can remove excess material and leave a mark.
The Swirl-Free Sanding Workflow
1. Use fresh abrasive and light pressure
Abrasive that has stopped cutting can make wood look shinier by burnishing it, yet it will not reliably remove the prior scratches or tool marks. Replace it when cutting slows; do not compensate by pressing harder.
Pressure should stay light enough that hand sanding does not make your fingers uncomfortably hot and power sanding does not make the drill motor sound strained. Heat shortens abrasive life and can permanently damage wood. In practical terms, let the grit cut, keep the contact moving, and pause if the surface or abrasive is warming rapidly.
2. Sand continuously, never park the power-sanding pad
When power sanding, keep the pad moving across the form with a controlled overlap. A pause in one location can remove excess material and leave a mark.
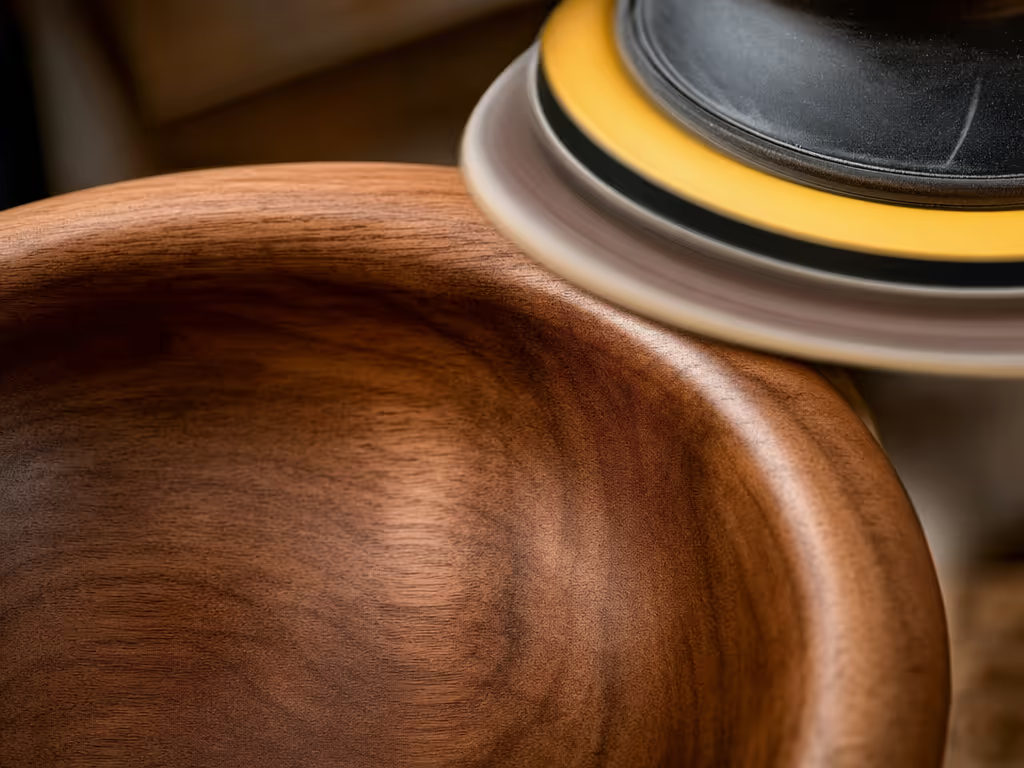
For sanding turned bowls with a powered disc, do not present the entire face of the disc flat to the rotating surface. Use an angled contact so only part of the pad is active. Full-face engagement can grab the bowl and vibrate unpredictably.
3. Match pad size to the curve
A power-sanding pad can bridge a tight inside bowl curve and spoil its fluid line, so these curved-surface sanding techniques are especially useful when choosing the contact method. For tight curves, use a smaller pad; a soft interface pad can help it conform. The goal is not merely a smooth surface. It is a smooth surface that preserves the intended line.
No collected comparative evidence establishes a best pad, abrasive brand, or powered setup. If you are reading spindle sander reviews or comparing accessories, judge the choice by whether it can maintain light, moving, controlled contact on your actual form, and follow the safety instructions for both the lathe and the powered accessory.
4. Clear dust and inspect before every grit change
Between grits, wipe, brush, or otherwise clear the surface before moving to the next grit. Loose particles from a coarser grade can create new scratches during a finer stage, which is one reason a finish can look inconsistent even when the grit labels were followed correctly.
Inspect under natural light or a spotlight positioned for raking light. Look along the curve, not straight at it. The inspection question is specific: Can I still see scratches from the previous grit? If yes, stay at the current grit. Move forward only after the current abrasive has removed the preceding grit's scratches.
Stop the Lathe to Break the Circular Scratch Pattern
On a bowl, use slow-speed sanding to work the general surface, then stop the lathe and address visible cross-grain scratches in end-grain and transition areas with the grain before progressing. This alternating approach is the correction pass for those areas.
For long spindle sections (straight, tapered, or gently curved) sand in line with the grain where practical. For spindle work and fine detail work, hand sanding is a practical option.
When raking light still reveals cross-grain marks, use a lathe-off pass to address them with the grain where the form allows before advancing.
Lathe Sanding Safety That Also Improves Finish Quality
Good lathe sanding safety is not separate from quality control. Follow reduced-speed and light-pressure guidance, and stop the machine to investigate vibration.
Keep these controls non-negotiable:
- Wear a high-velocity-impact-rated full face shield; safety glasses alone do not protect the face from heavier projectiles.
- Keep loose clothing, long sleeves, jewelry, watches, rings, and untied hair away from a running lathe.
- Use respiratory protection while sanding. OSHA identifies airborne wood dust from sanding and cutting as a potential health problem.
- Never put fingers inside a spinning hollow form or restricted opening.
- For square internal corners and corner sections beyond the safely accessible circular path, stop the lathe. For deep undercuts and difficult-to-reach shapes, sanding with the lathe off may be the safest option. Use a sanding stick, forceps handled without placing fingers through their loops, or another appropriate access aid.
- Follow the operating and safety materials supplied with your specific lathe and powered accessory.
I prefer quieter, lower-vibration setups even when they are slightly slower. At the lathe, reduce speed and stop the machine to investigate vibration.
A Short SOP for Repeatable Results
Use this checklist to train the process rather than rely on feel alone:
- Finish-cut first: sharp tool, light final pass, fair the shape before sanding.
- Choose the starting grit by defect depth: as fine as will remove the remaining marks efficiently.
- Reduce lathe speed: start conservatively; slow down or stop if vibration appears.
- Use fresh abrasive: light pressure; keep a power-sanding pad moving; no heat-driven forcing.
- Protect curves: use smaller pads for tight curves; a soft interface pad can help.
- Clean and inspect: remove loose grit before moving to the next grit; use raking light; do not advance until prior scratches are gone.
- Correct with the grain: stop the lathe for cross-grain scratch removal, transition zones, details, and unsafe areas.
FAQ
What is the golden rule of sanding?
There is no single universal rule, but the most useful one is: do not move to a finer grit until the current grit has removed the scratches from the one before it. Fresh abrasive, light pressure, and raking-light inspection make that rule workable.
Should you sand in circles or straight lines?
For bowl work, use controlled slow-speed sanding where appropriate, then stop the lathe and sand with the grain to address visible cross-grain scratches in end-grain and transition areas. On spindle sections, sand with the grain where practical.
What speed should you sand on a lathe?
Use reduced speed rather than turning speed. Approximately 250-500 RPM is published practical guidance for many bowls and medium turnings, while power sanding at 500 RPM or below is another guide. Adjust for the workpiece and stop if vibration occurs.
What are common sanding mistakes?
Common causes of swirls and rework include worn abrasive, excessive pressure or heat, skipping ahead before prior scratches are removed, failing to clear dust between grits, pausing a power-sanding pad in one spot, and putting the full face of a power-sanding disc onto a bowl.
Take the Next Step: Build Your Own Surface Recipe
After your next turning, record the starting defect, first grit, lathe speed, sanding method, and what raking light showed at each change. That log gives you a record of the sanding variables and observations for your common bowl and spindle forms.
The target is simple: begin with a clean tool-cut surface and fully erase the preceding grit's scratch pattern before each advance. Protect hands and lungs, preserve the profile, and let the finish confirm the work rather than expose it.
Related Articles